Tonight the Kings come and although maybe it is a little late to start making cookies, maybe you want to do some crafts with them to make them relax tonight if they are nervous thinking about the Magi. You can make these fun Three Kings cookies decorated with royal glasa with the help of your children.
Decorate cookies with royal icing or royal icing It is much easier than it seems. The task that takes a little more practice is to prepare the glasa but for this there is also a solution.
First of all I will explain what real glase is, it is a mixture made from egg white, icing sugar and water but to decorate cookies, it is much more recommended to use dehydrated egg white (egg albumin), first because it is not going to cook and the egg is somewhat dangerous if raw is consumed, so it is better not to take a risk and second because the final result in the cookie is infinitely better.
Today I am going to show you how to decorate Three Kings cookies using a glasa mixture to which you just have to add water. You can find this mixture of royal icing in specialized confectionery stores, I bought mine here. Otherwise, you can also see the royal icing recipe here.
What we need to make decorated Three Kings cookies
- Glasa Real or prepared to make real glasa (you can buy it at Decake)
- Water
- Food dyes in gel or paste
- Round cookies (cookie dough recipe here)
- Disposable pastry sleeves
- Nozzles sizes 1 and 2 (I recommend Wilton or PME brands)
How to decorate cookies with real icing
- First we have to prepare the glasa and give it the desired consistency (a kind of toothpaste consistency that when removed again becomes flat after about ten seconds if we shake the container), if it is very thick we will add more water. If you prepare the glaze with the preparation I used to make these cookies, they indicate the necessary amounts of water.
- We divide the glaze into different small containers, as many as colors we will use and dye them by putting the dye with the help of a toothpick.
- We remove so that the color is uniform, I advise you not to go over dye, you are always in time to add more dye but not to remove it (unless you have kept white glasa).
- You put the glasa inside the pastry bag with the nozzle (you have to make a hole in the sleeve so that the nozzle fits) and close with a clamp so that it does not come out glasa above.
- To decorate the cookie we start by drawing the edge with the nozzle # 2 and then fill with more glasa of the same color being generous with the amount of glasa.
- To make the beard you can use the nozzle # 1. If the nozzle gets stuck you can use a pin to unclog it.
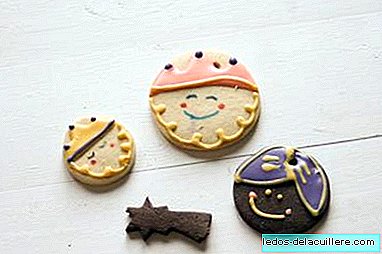
- In my case, my son made some lovely abstract cookies, but he is 2 and a half years old. Then we took the sleeve between the two and outlined the cookies you see in the photo.


What we learned by making the cookie glaze
Apart from spending a fun time together, we learned to dye white glasa with dye, if we put a little color it was clearer and if we added more color it would get darker. Then he also made a kind of mixture between colors and something similar to a brown was left (what happened to us when we mixed the plastelina as children and we wanted to see what color it was).He also learned to handle the sleeve, at first he squeezed a lot and too much glasa came out, in the end he already took it easy and did so becoming aware of the pressure he exerted on the sleeve.